Setting up your follow-up team
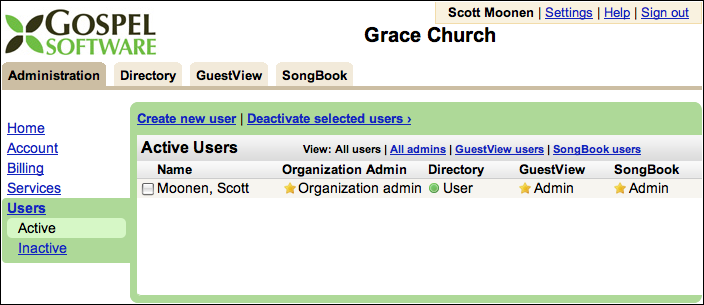
Now that you’ve seen some of what GuestView can do, we’re ready to get your follow-up team set up to start using GuestView. To do this, click on the “Administration” tab at the top of the GuestView page, and then click on the “Users” menu item on the left-hand side. You’ll see yourself in the list of users:

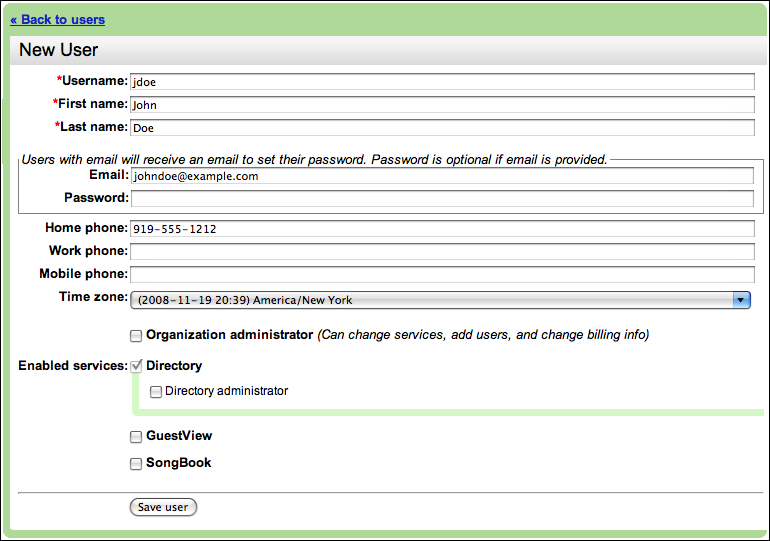
For each of the members of your calling team, you’ll need to click the “Create new user” link, which will bring up the following page where you can enter a team member’s information:

After typing in your team member’s information, you should select the checkbox to enable them to use GuestView:

As shown above, you can also choose whether you want to:
-
Make your team member a GuestView administrator. If you choose to make this caller an administrator, they will be able to add other team members to use GuestView, and change a few other settings like tags.
-
Enter a title for your team member. This may be “Data entry,” “Caller,” “Team leader,” “Pastor,” “etc. This title will show up several places in GuestView next to your team members’ names.
-
Enter a group for your team member. In several places in GuestView, your team members will be grouped together if you type in the same group name for them. If your team is fairly small then you probably do not need to type in any group name. But if your team is larger, you should think about the process of assigning guests to callers and consider what groupings might help you choose an appropriate caller for a guest. If you assign guests to callers based on geographic location, then you might want to type group names like “East shore” and “West shore.” If you have rotating follow-up teams that take responsibility for different weeks or months, you might want to type group names like “Team 1” and “Team 2.” And if you want to separate out your data entry team from callers, you might also want to type in a “Data entry” group so that you remember not to assign a guest to those team members.
Once you’ve typed this information, click “Save user.” You’ll then need to repeat this process for each member of your follow-up team.
